


An Epson L1500U installation can go wrong long before anyone turns on the projector. Common trouble points include choosing a lens before measuring the room, fixing a mount location before checking service access, and budgeting for the projector without the rest of the system. This Epson L1500U Setup Guide and Buying Considerations article puts those decisions in a practical order.
The provided lineup centers on the Epson Pro L1500U Laser projector and three separate Epson lens candidates: ELP-LM01, ELPLW08, and ELPLU04. Their listings alone do not prove compatibility with the L1500U. Treat them as a shortlist to validate against the exact projector, image size, and measured lens-to-screen distance. This guide explains deployment fit, lens planning, installation steps, project-level value, and procurement timing. Before approval, confirm the projector’s brightness, native resolution, supported lenses, connections, power needs, mounting requirements, and operating clearances through current product documentation.
Products at a Glance
- Option 1: Epson Pro L1500U Laser projector
- For layouts that fall within the lens’s verified proj…: Epson V12H004M01 ELP-LM01 Medium-throw Zoom Lens 70.3mm-105.8mm F/2.0-2.7
- For layouts in which current Epson documentation call…: Epson V12H004W08 Wide Throw #3 Zoom Lens ELPLW08
- For space-constrained layouts that match the lens’s v…: Epson V12H004U04 ELPLU04 Short-Throw Zoom Lens for Select Projectors
Quick Comparison Table
| Feature | Epson Pro L1500U Laser projector | Epson V12H004M01 ELP-LM01 Medium-throw Zoom Lens 70.3mm-105.8mm F/2.0-2.7 | Epson V12H004W08 Wide Throw #3 Zoom Lens ELPLW08 | Epson V12H004U04 ELPLU04 Short-Throw Zoom Lens for Select Projectors |
|---|---|---|---|---|
| Brightness | 12,000 lumen | |||
| Best For | Teams evaluating the L1500U as the central projector in a documented, professionally planned installation. | Layouts that fall within the lens’s verified projection range after exact projector compatibility and room geometry are confirmed. | Layouts in which current Epson documentation calls for this exact wide-throw lens SKU and the calculated image range matches the room. | Space-constrained layouts that match the lens’s verified range and use a projector explicitly approved for this exact lens. |
| Throw Type | Short throw | |||
| Recommended Buyer | Teams evaluating the L1500U as the central projector in a documented, professionally planned installation. | Layouts that fall within the lens’s verified projection range after exact projector compatibility and room geometry are confirmed. | Layouts in which current Epson documentation calls for this exact wide-throw lens SKU and the calculated image range matches the room. | Space-constrained layouts that match the lens’s verified range and use a projector explicitly approved for this exact lens. |
Product Images


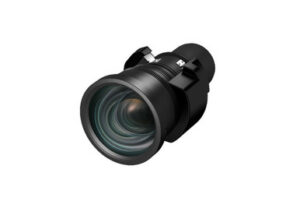

Projector Options from AudioVideoNation
1. Epson Pro L1500U Laser projector
Who should compare it: Teams evaluating the L1500U as the central projector in a documented, professionally planned installation.
Why it belongs here: It is the projector named in the deployment brief, so every geometry, infrastructure, and procurement decision must be checked against this exact SKU. The supplied product name identifies it as a laser projector.
SKU: L1500U
Key Features
- Epson Pro L1500U product identity
- Laser projector designation in the supplied product name
- Exact ordering reference: L1500U
- Listed under Multimedia Projectors, Projectors, and Video
Things to Consider
Confirm brightness, native resolution, supported lenses, input and control options, power requirements, mounting details, and operating clearances before specifying it.
2. Epson V12H004M01 ELP-LM01 Medium-throw Zoom Lens 70.3mm-105.8mm F/2.0-2.7
Who should compare it: Layouts that fall within the lens’s verified projection range after exact projector compatibility and room geometry are confirmed.
Why it belongs here: The ELP-LM01 gives buyers a clearly identified medium-throw lens candidate to investigate during placement planning. Inclusion is a research path, not a compatibility claim for the L1500U.
SKU: V12H004M01
Key Features
- Epson ELP-LM01 lens identity
- Medium-throw zoom designation in the supplied product name
- Exact ordering SKU: V12H004M01
- Listed under Accessories, Lenses, and Projectors
Things to Consider
Verify written compatibility with the L1500U and calculate the supported image range from the measured optical position before purchase.
3. Epson V12H004W08 Wide Throw #3 Zoom Lens ELPLW08
Who should compare it: Layouts in which current Epson documentation calls for this exact wide-throw lens SKU and the calculated image range matches the room.
Why it belongs here: The ELPLW08 adds a wide-throw-labeled option to the planning shortlist for rooms where the projector position may be farther from the screen. Compatibility and usable geometry still require validation.
SKU: V12H004W08
Key Features
- Epson ELPLW08 lens identity
- Wide-throw zoom designation in the supplied product name
- Exact ordering SKU: V12H004W08
- Listed under Accessories, Lenses, and Projectors
Things to Consider
Do not infer L1500U compatibility from the Epson brand or lens name. Confirm the approved projector pairing and projection range in current documentation.
4. Epson V12H004U04 ELPLU04 Short-Throw Zoom Lens for Select Projectors
Who should compare it: Space-constrained layouts that match the lens’s verified range and use a projector explicitly approved for this exact lens.
Why it belongs here: The ELPLU04 provides a short-throw candidate for sites with limited projector-to-screen distance. Its listing says it is for select projectors, so exact compatibility must be established before design approval.
SKU: ELPLU04
Key Features
- Epson ELPLU04 lens identity
- Short-throw optical category in the supplied product data
- Zoom-lens designation in the supplied product name
- Exact supplied SKU: ELPLU04
- Listed under Lenses, Multimedia Projectors, Projectors, and Video
Things to Consider
Confirm that ELPLU04 is the required ordering reference, validate L1500U compatibility, and calculate placement from the final screen dimensions.
Epson Pro L1500U Laser projector vs Epson V12H004M01 ELP-LM01 Medium-throw Zoom Lens 70.3mm-105.8mm F/2.0-2.7: Main Differences
- Choose Epson Pro L1500U Laser projector if Teams evaluating the L1500U as the central projector in a documented, professionally planned installation..
- Choose Epson V12H004M01 ELP-LM01 Medium-throw Zoom Lens 70.3mm-105.8mm F/2.0-2.7 if Layouts that fall within the lens’s verified projection range after exact projector compatibility and room geometry are confirmed..
- Choose Epson V12H004W08 Wide Throw #3 Zoom Lens ELPLW08 if Layouts in which current Epson documentation calls for this exact wide-throw lens SKU and the calculated image range matches the room..
- Choose Epson V12H004U04 ELPLU04 Short-Throw Zoom Lens for Select Projectors if Space-constrained layouts that match the lens’s verified range and use a projector explicitly approved for this exact lens..
Define deployment fit before selecting hardware
Start with the room. Work backward to the equipment. Record the required image width and height, screen position, planned projector location, viewing distances, ambient-light conditions, ceiling restrictions, and access for future service. Identify every content source and decide who will operate the system. These details form the deployment brief against which the L1500U and any lens must be checked.
Churches should account for presentation content, camera sightlines, platform lighting, and the skills of volunteers who may run the system. Schools may prioritize repeatable controls, protected cable routes, room standardization, and straightforward support. Conference room teams should document the computers and other sources people will connect, along with any room-control workflow that the finished system must support.
Turn those needs into acceptance criteria. Set a required image size, approved mounting area, source list, control method, service route, and installation deadline. Then verify that current L1500U documentation satisfies each point. A recognizable model number is not enough. The projector earns a place in the design only after its documented capabilities match the room and operating plan.
Epson projector lens selection starts with geometry
Lens choice begins with measured geometry, not a product label. Measure the distance from the intended lens position to the screen plane. Record the required image dimensions and the amount of placement tolerance available around the proposed mount. Use current Epson projection data to determine which supported lens covers that exact combination.
The supplied products create three useful research paths. The ELP-LM01 product name identifies a medium-throw zoom lens. The ELPLW08 listing identifies a wide-throw zoom lens, while the ELPLU04 is identified as a short-throw zoom lens. These labels help organize the search. They do not confirm that any of the lenses fits the L1500U or produces the required image from your planned location.
Validate each lens by its exact SKU. Confirm projector compatibility, supported image range at the measured distance, permitted orientation, adjustment range, and installation procedure. Measure from the planned optical position rather than the projector enclosure or mounting plate. Small reference errors can push a design outside the documented range.
Keep a simple lens worksheet with the projector SKU, lens SKU, screen dimensions, measured distance, mounting tolerance, and the document used for validation. Installers and buyers can then review the same evidence before equipment is ordered or mounting points are approved.
Follow a controlled Epson L1500U installation sequence
A fixed sequence keeps construction decisions from outrunning the optical design.
1. Survey the site. Confirm screen position, structural mounting area, obstructions, cable paths, service access, and room-light conditions. Photograph and label the proposed locations for the project record.
2. Freeze the image requirement. Document the screen dimensions and intended image area. If the screen has not been installed, confirm its final position before calculating throw geometry.
3. Validate the optical package. Match the exact L1500U identifier and chosen lens SKU to current compatibility and projection documentation. Record the acceptable placement range rather than relying on a single ideal measurement.
4. Approve the physical support. Verify the projector’s documented weight, mounting pattern, orientation rules, ventilation clearances, and service space. Overhead structures and mounting hardware should be reviewed by qualified personnel for the installation site.
5. Prepare infrastructure. Route power, video, data, and control cabling required by the approved design. Label both ends and leave service access where the projector and any signal hardware will be maintained.
6. Install the lens and projector. Follow current Epson instructions for lens handling, insertion, mounting, and startup. Do not force a lens or improvise a retention method if the components do not mate as documented.
7. Align, test, and document. Establish the image mechanically, test every approved source, and record final mounting measurements, cable labels, product identifiers, and configuration details.
Pause the installation if the room measurements, lens SKU, or projector documentation differs from the approved plan. Resolving that mismatch before drilling or cable termination is far easier than redesigning a finished room.
Plan power, signal, and control as one system
Build a source-to-screen signal map before choosing cables or transport hardware. List each source, its required video format, its location, the cable distance, and the desired control path. Then compare that list with the L1500U connections and supported formats documented for the exact product. Do not assume an input, network function, or control protocol from the model family name.
For extended cable routes, test the complete path with the approved source equipment and the same signal format expected in daily use. Include adapters, wall plates, switchers, and extenders in that test. A projector cannot correct a failure elsewhere in the chain.
Power planning also needs current technical data. Confirm voltage, current, connector, grounding, and shutdown requirements before assigning a circuit or power-control method. Check the required operating clearances and heat-management guidance while the mounting area is still adjustable.
Finally, define the user workflow. Document how an operator selects a source, starts and stops a session, handles a lost signal, and reports a fault. A short operating guide matters in volunteer-run worship spaces, shared classrooms, and conference rooms with rotating users.
Commission the image before handing over the room
Begin commissioning with physical alignment. Center and level the projector within the approved mounting range, establish the target image size with the validated lens, and focus using suitable test content. Check the full image area rather than judging sharpness at the center alone. If electronic correction is available in the confirmed configuration, treat it as a documented commissioning setting rather than a substitute for careful placement.
Test every approved source and signal path. Use representative presentations, fine text, motion, dark material, and bright material so the team can spot cropping, scaling, focus, or connection problems. Confirm that the displayed format matches the project’s documented requirement. The supplied product data does not support prescribing a resolution or brightness setting, so use current Epson instructions and the room’s acceptance criteria.
Record the final lens SKU, lens-to-screen measurement, image dimensions, mount position, cable identifiers, source settings, and control configuration. Keep that record with the room documentation. If a future service visit changes the image or signal path, the technician has a known baseline instead of rebuilding the setup from memory.
Assess projector price-to-performance across the full project
Projector price-to-performance should be measured against the installed system and its required outcome. Obtain live commerce details from the linked product pages, then account for the validated lens, mount, cabling, signal transport, control hardware, electrical work, installation labor, commissioning, and any room changes. The projector is one line in that calculation.
Use a pass-or-fail requirements matrix before comparing quotes. The L1500U must satisfy the confirmed image, placement, source, control, power, and service requirements. The selected lens must meet both the geometry and compatibility checks. A component offers poor value if it forces an unplanned mounting move, cable reroute, or change to the intended image.
Separate required costs from optional improvements. This makes tradeoffs visible without inventing a performance claim. For example, compare the cost of using a validated lens at the preferred mounting point with the construction and infrastructure consequences of another approved position. Keep the decision tied to documented requirements.
Request exact SKUs on every quote. Similar model codes can describe different products, and a substitution can invalidate compatibility or placement work. Recheck the complete package if any part number changes.
Manage projector stock and availability before scheduling
Stock and availability affect the installation sequence, but commerce details can change. Check each linked product page for current information and confirm the exact projector and lens SKUs with the seller before committing crews, lifts, room closures, or commissioning dates.
Build procurement gates into the schedule. First, secure written confirmation that the chosen lens is compatible with the exact L1500U configuration. Next, confirm the order contents and expected delivery timing for every critical component. Inspect model and SKU labels when the products arrive. Only then should the team release final mounting work that depends on those dimensions and identifiers.
Create a contingency plan for schedule changes. Decide whether the room can remain open, whether infrastructure work can proceed without the projector, and which decisions must wait for the validated optical package. Do not replace a delayed lens with another Epson lens solely because its name sounds close. Recalculate geometry and repeat the compatibility check for every substitution.
This process protects project value. It connects purchasing to the approved design and gives churches, schools, and conference room teams a clear point at which the deployment is ready to move from planning into installation.
Related AudioVideoNation Links
- Browse Projector at AudioVideoNation
- Epson Pro L1500U Laser projector
- Epson ELP-LM01 medium-throw zoom lens
- Epson ELPLW08 wide-throw zoom lens
- Epson ELPLU04 short-throw zoom lens
Product Information Sources
- Epson Pro L1500U Laser projector product information
- Epson V12H004M01 ELP-LM01 Medium-throw Zoom Lens 70.3mm-105.8mm F/2.0-2.7 product information
- Epson V12H004W08 Wide Throw #3 Zoom Lens ELPLW08 product information
- Epson V12H004U04 ELPLU04 Short-Throw Zoom Lens for Select Projectors product information
FAQ
Is the ELP-LM01 compatible with the Epson L1500U?
Compatibility between the ELP-LM01 and Epson L1500U cannot be confirmed from the supplied product data. Verify the exact projector-and-lens pairing in current Epson documentation and on the linked product pages before purchase.
Which lens should I choose for an Epson L1500U installation?
Choose the lens whose current compatibility data and documented projection range match your screen size and measured lens-to-screen distance. The ELP-LM01, ELPLW08, and ELPLU04 are planning candidates, but their names alone do not establish fit with the L1500U.
What should be confirmed before mounting the Epson L1500U?
Confirm the screen dimensions, lens compatibility, projection geometry, structural support, operating clearances, power needs, cable routes, inputs, and control method before mounting the Epson L1500U. Record those decisions in the approved design so installers and buyers work from the same requirements.
How should buyers evaluate Epson L1500U price-to-performance?
Evaluate Epson L1500U price-to-performance by comparing the complete live project quote with confirmed image, placement, connectivity, control, and service requirements. Include the validated lens, mount, infrastructure, installation, and commissioning rather than assessing the projector alone.
How should stock and availability affect the installation schedule?
Set the installation date only after the exact projector and lens SKUs and their expected delivery timing are confirmed. Check the linked product pages for live commerce details, and repeat design validation before accepting any substitution.
Can buyers assume a brightness or resolution for the Epson L1500U from this guide?
Buyers should not assume a brightness or resolution for the Epson L1500U from this guide. Confirm both specifications on the current product page and in applicable technical documentation, then compare them with the room’s written acceptance criteria.
Conclusion
Use this Epson L1500U Setup Guide and Buying Considerations comparison to match documented specifications to the room and installation requirements. Review the linked product pages for current purchase details before ordering.
Products Used
| SKU | Product Name | URL |
|---|---|---|
| L1500U | Epson Pro L1500U Laser projector | View product |
| V12H004M01 | Epson V12H004M01 ELP-LM01 Medium-throw Zoom Lens 70.3mm-105.8mm F/2.0-2.7 | View product |
| V12H004W08 | Epson V12H004W08 Wide Throw #3 Zoom Lens ELPLW08 | View product |
| ELPLU04 | Epson V12H004U04 ELPLU04 Short-Throw Zoom Lens for Select Projectors | View product |