
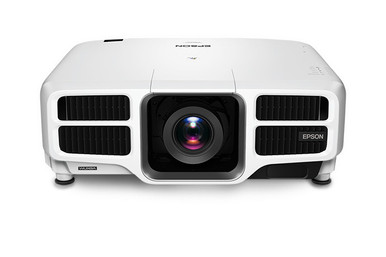
An Epson L1490U installation can go off course before the projector reaches the room. The image may not fit the measured throw, lens compatibility may remain unverified, or installation work may be scheduled before every component is confirmed. This Epson L1490U Setup Guide and Buying Considerations resource centers on the Epson Pro L1490U WUXGA 3LCD Laser Projector. The supplied product facts list WUXGA resolution. It also examines two lens candidates and an ultra short throw alternative without assuming compatibility. Churches, schools, conference room teams, and installers can use this guide to define deployment fit, plan setup, protect the schedule, and assess price-to-performance.
Products at a Glance
- Option 1: Epson Pro L1490U WUXGA 3LCD Laser Projector
- For installers evaluating a wider-throw lens route af…: Epson V12H004W08 Wide Throw #3 Zoom Lens ELPLW08
- For measured layouts that call for a short-throw lens…: Epson V12H004U04 ELPLU04 Short-Throw Zoom Lens for Select Projectors
- For buyers comparing the planned L1490U installation…: Epson PowerLite 875E 5 Ultra Short Throw Display with 4K Enhancement (V11HC04120)
Quick Comparison Table
| Feature | Epson Pro L1490U WUXGA 3LCD Laser Projector | Epson V12H004W08 Wide Throw #3 Zoom Lens ELPLW08 | Epson V12H004U04 ELPLU04 Short-Throw Zoom Lens for Select Projectors | Epson PowerLite 875E 5 Ultra Short Throw Display with 4K Enhancement (V11HC04120) |
|---|---|---|---|---|
| Brightness | 12,000 lumen | |||
| Resolution | WUXGA | 4K | ||
| Best For | Churches, schools, conference rooms, and installers building a documented fixed-projector plan around WUXGA content. | Installers evaluating a wider-throw lens route after measuring the room and confirming the exact projector pairing. | Measured layouts that call for a short-throw lens and pass the projector compatibility and throw-range checks. | Buyers comparing the planned L1490U installation with an ultra short throw, 4K alternative based on room geometry. |
| Throw Type | Short throw | Ultra short throw | ||
| Recommended Buyer | Churches, schools, conference rooms, and installers building a documented fixed-projector plan around WUXGA content. | Installers evaluating a wider-throw lens route after measuring the room and confirming the exact projector pairing. | Measured layouts that call for a short-throw lens and pass the projector compatibility and throw-range checks. | Buyers comparing the planned L1490U installation with an ultra short throw, 4K alternative based on room geometry. |
Product Images

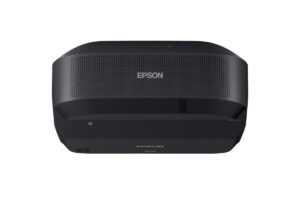
Projector Options from AudioVideoNation
1. Epson Pro L1490U WUXGA 3LCD Laser Projector
Who should compare it: Churches, schools, conference rooms, and installers building a documented fixed-projector plan around WUXGA content.
Why it belongs here: This is the exact projector at the center of the guide. The supplied facts confirm WUXGA resolution, giving design teams a clear starting point for source and content planning while they verify the remaining installation requirements.
SKU: L1490U
Key Features
- WUXGA resolution in the supplied product facts
- Exact catalog SKU: L1490U
- Listed in the Multimedia Projectors, Projectors, and Video categories
- Dedicated product page for current commerce details
Things to Consider
Verify brightness, throw geometry, compatible lenses, connections, dimensions, mounting, power, ventilation, and control capabilities in current Epson documentation before approving the design.
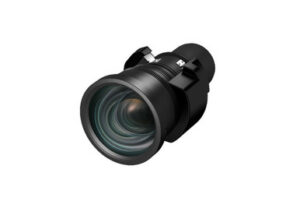
2. Epson V12H004W08 Wide Throw #3 Zoom Lens ELPLW08
Who should compare it: Installers evaluating a wider-throw lens route after measuring the room and confirming the exact projector pairing.
Why it belongs here: This lens gives buyers a cataloged wide-throw zoom option to research when the measured room geometry points toward that optical path. Its inclusion is a planning comparison, not a compatibility claim.
SKU: V12H004W08
Key Features
- Exact catalog SKU: V12H004W08
- Catalog name identifies a Wide Throw #3 zoom lens
- Listed in the Accessories, Lenses, and Projectors categories
- Separate product page for verification and live commerce details
Things to Consider
The supplied facts do not establish its throw ratio or compatible projector list. Confirm L1490U compatibility, image-size limits, adjustment range, and measured throw before purchase.
3. Epson V12H004U04 ELPLU04 Short-Throw Zoom Lens for Select Projectors
Who should compare it: Measured layouts that call for a short-throw lens and pass the projector compatibility and throw-range checks.
Why it belongs here: The supplied facts classify this lens as short throw, so it provides a closer-placement path to evaluate alongside a wide-throw candidate. Exact compatibility still requires documentation.
SKU: ELPLU04
Key Features
- Short throw classification in the supplied product facts
- Exact catalog SKU: ELPLU04
- Catalog name identifies a zoom lens for select projectors
- Listed in the Lenses, Multimedia Projectors, Projectors, and Video categories
Things to Consider
Short throw classification alone does not establish fit. Verify the compatible projector list, throw ratio, image-size range, lens adjustment, mounting clearance, and orientation requirements.
4. Epson PowerLite 875E 5 Ultra Short Throw Display with 4K Enhancement (V11HC04120)
Who should compare it: Buyers comparing the planned L1490U installation with an ultra short throw, 4K alternative based on room geometry.
Why it belongs here: This product supplies a different deployment path for rooms being assessed for ultra short throw placement. The supplied facts list 4K resolution and an ultra short throw format.
SKU: PL-875E
Key Features
- 4K resolution in the supplied product facts
- Ultra short throw classification
- Exact catalog SKU: PL-875E
- Listed in the Projectors category
Things to Consider
Do not assume it is a direct substitute for the L1490U. Recheck brightness, image sizing, mounting, projection-surface requirements, connections, power, control, audio, and total installation scope.
Epson Pro L1490U WUXGA 3LCD Laser Projector vs Epson V12H004W08 Wide Throw #3 Zoom Lens ELPLW08: Main Differences
- Choose Epson Pro L1490U WUXGA 3LCD Laser Projector if Churches, schools, conference rooms, and installers building a documented fixed-projector plan around WUXGA content..
- Choose Epson V12H004W08 Wide Throw #3 Zoom Lens ELPLW08 if Installers evaluating a wider-throw lens route after measuring the room and confirming the exact projector pairing..
- Choose Epson V12H004U04 ELPLU04 Short-Throw Zoom Lens for Select Projectors if Measured layouts that call for a short-throw lens and pass the projector compatibility and throw-range checks..
- Choose Epson PowerLite 875E 5 Ultra Short Throw Display with 4K Enhancement (V11HC04120) if Buyers comparing the planned L1490U installation with an ultra short throw, 4K alternative based on room geometry..
Define the Epson L1490U deployment fit first
Write the room brief before selecting accessories. Record the desired image dimensions, audience distance, mounting location, available throw distance, ceiling height, obstructions, ambient-light conditions, and service access. Document the content too. Worship lyrics, classroom text, spreadsheets, cameras, and video can place different demands on image size and signal handling.
Use the confirmed WUXGA resolution as the starting point for source planning. Then verify supported signal formats, scaling behavior, connectors, and cable requirements in current Epson documentation. The supplied data does not establish those details.
Set measurable acceptance criteria. The image should fit the intended surface, remain legible from the planned seats, display each required source, and respond correctly to the room-control workflow. Agree on those tests with the buyer, installer, and daily operators. That short document keeps preference from replacing evidence later.
Build a practical Epson L1490U setup sequence
A disciplined installation sequence catches expensive mistakes while they are still easy to correct.
1. Survey the room. Measure image width and height, usable throw distance, mounting clearance, cable routes, power access, obstructions, and maintenance access. Note where the throw-distance measurement begins according to Epson documentation.
2. Validate the optical design. Match the measured geometry to an officially compatible lens and its documented throw range. A similar name or mounting appearance is not proof of compatibility.
3. Design the infrastructure. Confirm the mount, power, source path, switching, signal transport, network or control path, and any separate audio system. Check each choice against current product documentation and applicable codes.
4. Bench-check the system. Before mounting, verify the projector, selected lens, sources, transport equipment, and control components together. Keep packaging and identification records until acceptance is complete.
5. Install and align. Establish the physical position first. Use only the optical and image adjustments documented for the exact projector-and-lens pairing.
6. Commission and hand off. Test real content, record settings, label cables, and give operators a concise startup, shutdown, source-selection, and support procedure.
Use measured room geometry for Epson projector lens selection
Lens selection begins with three values: image width, throw distance, and the documented throw-ratio range. Throw ratio is calculated by dividing throw distance by image width, but the manufacturer’s specified measurement point still controls the final design. Use Epson’s current calculator or installation documentation to validate the result.
The catalog name for the Epson V12H004W08 identifies a Wide Throw #3 Zoom Lens. The supplied facts classify the Epson ELPLU04 as short throw. These products frame two different optical paths, but the inputs do not confirm that either lens works with the L1490U. Treat them as candidates for verification.
Check more than throw ratio. Confirm the compatible projector list, supported image-size range, zoom limits, lens position, adjustment range, mounting clearance, and any installation-orientation restrictions. Leave a measurement margin rather than designing at an undocumented boundary. If the building dimensions change, recalculate before approving the lens order.
Plan mounting, signals, power, control, and audio
Map the complete signal path from each source to the projector. Include switchers, scalers, adapters, cable transport, wall plates, and control processors. Confirm every connector and supported format from current documentation. WUXGA resolution alone does not establish which source signals or connection methods the projector accepts.
Have the mounting structure, bracket, fasteners, and safety provisions reviewed for the actual installation. Follow the documented orientation, ventilation clearance, electrical requirements, and local codes. Keep filters, panels, cables, and lens areas reachable for service.
Plan sound as its own system requirement. Decide whether audio goes through a room DSP, mixer, amplifier, conferencing platform, or another path, then verify timing and control behavior during commissioning. For managed rooms, define power commands, source selection, status monitoring, network addressing, and recovery steps before programming begins.
Commission the WUXGA projector installation with real content
Start commissioning with physical alignment. Confirm the mount is stable, the lens is seated according to its instructions, and the image lands on the intended surface. Correct mechanical position before relying on documented image adjustments. Test focus and geometry across the full image, including corners and fine text.
Run every planned source through the installed signal path. Use the organization’s real slides, spreadsheets, videos, camera feeds, or worship software alongside test material. Check normal and challenging room-light states. Confirm startup, shutdown, source switching, control commands, and recovery after a power cycle.
Record the projector SKU, lens SKU, cable endpoints, source settings, control configuration, and approved image settings. Save configuration files where the equipment supports them. Finish with operator training and a signed acceptance checklist tied to the deployment brief.
Stock and availability: protect the installation schedule
Treat stock and availability as purchase-stage checks, not permanent design facts. Visit each linked product page for live commerce details and confirm the complete equipment list before scheduling installers, lifts, room closures, or training.
Track the projector, verified lens, mount, screen, signal transport, control hardware, cables, and installation accessories separately. One missing dependency can stop commissioning even when the main projector has arrived. Inspect model numbers and physical condition before moving equipment to the job site.
Set a decision date for substitutions. Any alternate projector or lens should restart the geometry, compatibility, mounting, signal, and control review. A deadline does not make an unverified accessory safe to install.
Judge price-to-performance across the installed system
Build the price-to-performance comparison around total installed cost and the agreed acceptance criteria. Include the projector, verified lens, mount, projection surface, switching, signal extension, control equipment, power work, cabling, labor, access equipment, commissioning, training, and service access. Check the linked pages for current commerce details.
Separate requirements from preferences. Image fit, readable content, verified connectivity, safe mounting, and dependable operation belong in the required column. Resolution labels and accessory choices matter only when they support the room’s actual workflow.
Compare designs on the same scope. A lower equipment total can lose its advantage if the room needs structural changes, unusual cable work, or a different screen. A higher-resolution alternative is not automatically the stronger value. The winning design is the one that passes the documented room tests with an acceptable full-system commitment.
Consider an ultra short throw alternative when geometry demands it
The Epson PowerLite 875E offers a separate design path. Its supplied facts list 4K resolution and an ultra short throw format. That makes it relevant when the room survey calls for an ultra short throw layout rather than the L1490U installation being planned here.
Do not treat it as a drop-in substitute. Recheck image dimensions, mounting, projection-surface requirements, sources, control, audio, power, service access, and the complete installed cost. Resolution and throw type help define the shortlist, but they do not settle deployment fit by themselves.
Related AudioVideoNation Links
- Browse Projector at AudioVideoNation
- Epson Pro L1490U product page
- Epson V12H004W08 lens product page
- Epson ELPLU04 short-throw lens product page
- Epson PowerLite 875E product page
Product Information Sources
- Epson Pro L1490U WUXGA 3LCD Laser Projector product information
- Epson V12H004W08 Wide Throw #3 Zoom Lens ELPLW08 product information
- Epson V12H004U04 ELPLU04 Short-Throw Zoom Lens for Select Projectors product information
- Epson PowerLite 875E 5 Ultra Short Throw Display with 4K Enhancement (V11HC04120) product information
FAQ
What resolution does the Epson L1490U use?
The supplied product facts list the Epson L1490U at WUXGA resolution. Confirm supported source formats, scaling behavior, and connection requirements in current Epson documentation before finalizing the signal path.
How should I choose a lens for the Epson L1490U?
Choose a lens only after matching measured image width and throw distance to Epson’s current compatibility and throw documentation. Verify the exact projector pairing, image-size range, adjustment limits, mounting position, and measurement reference.
Can I assume the V12H004W08 or ELPLU04 works with the L1490U?
No, compatibility between these lenses and the L1490U cannot be assumed from the supplied product inputs. Check Epson’s current compatible-lens list and validate the complete optical design before ordering either lens.
How should buyers handle stock and availability for a scheduled installation?
Check every linked product page for live commerce details and confirm the complete system timing before scheduling installation labor. Track the projector, verified lens, mount, screen, cabling, control equipment, and accessories as separate dependencies.
How do I assess Epson L1490U price-to-performance?
Compare the total installed system cost with documented room and workflow requirements. Include the verified lens, mounting, screen, signal path, control, electrical work, labor, commissioning, training, and service access alongside the projector.
Is the Epson PowerLite 875E a direct replacement for the L1490U?
No, the PowerLite 875E should be evaluated as a different ultra short throw, 4K deployment path rather than a drop-in replacement. Revalidate room geometry, mounting, surface, signal, control, audio, power, and cost requirements.
Conclusion
Use this Epson L1490U Setup Guide and Buying Considerations comparison to match documented specifications to the room and installation requirements. Review the linked product pages for current purchase details before ordering.
Products Used
| SKU | Product Name | URL |
|---|---|---|
| L1490U | Epson Pro L1490U WUXGA 3LCD Laser Projector | View product |
| V12H004W08 | Epson V12H004W08 Wide Throw #3 Zoom Lens ELPLW08 | View product |
| ELPLU04 | Epson V12H004U04 ELPLU04 Short-Throw Zoom Lens for Select Projectors | View product |
| PL-875E | Epson PowerLite 875E 5 Ultra Short Throw Display with 4K Enhancement (V11HC04120) | View product |